4 minutes
Hosting Static Website in AWS
This is a ramp up of my previous post on hosting Hugo website in Amazon S3.
For this small project, I will be using Route53 for my static website DNS, CloudFront for CDN and S3 bucket to host my static files.
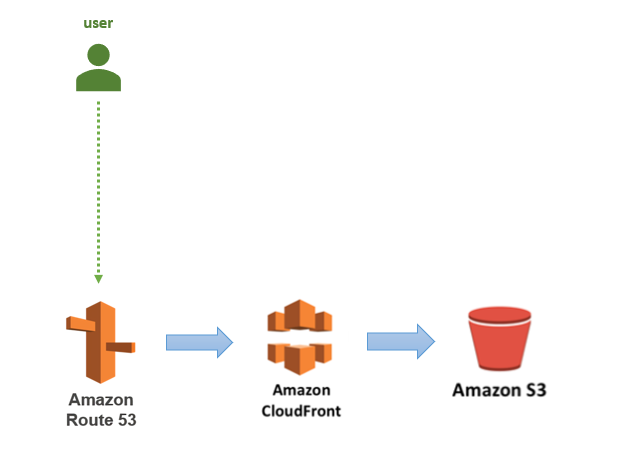
For the S3 bucket set up, I will be using AWS CLI instead of the AWS Console. I will also be provisioning my SSL certificate using the AWS Certificate Manager to secure the site.
1. Install AWSCLI
Install awscli if you don’t have it yet:
  ```
   $ pip install awscli
  ```
2. Set up IAM
In AWS, create an IAM user with programmatic access.
- in the AWS IAM users page, click Add user.
- input the user name and select Programmatic access for the Access type.
- for the Permission, you can attach the AdministratorAccess policy.
- take note of the Access Key ID and Secret Access Key as this will be used later during awscli configuration.
3. Configure CLI
In the terminal, run the command:
$ aws configure
Input the Access Key and Secret Key previously saved during IAM creation, the default region and the default output formal e.g. JSON.

Verify the configuration by listing the buckets in S3
$ aws s3 ls
4. Create S3 bucket
The static files will be hosted via the S3 bucket. Run the following command in the terminal to create the bucket. The bucket name should be equivalent to your domain name. For my case, I want both the www.domain and the naked domain (without www.) so I removed the www. prefix in my bucket name. You can actually do either.
$ aws s3 mb s3://www.website.com
Configure the bucket to render index.html when a user visits the root URL and the error.html when the page does not exist.
$ aws s3 website s3://www.website.com --index-document index.html --error-document error.html

You may also verify the created bucket in the AWS console.
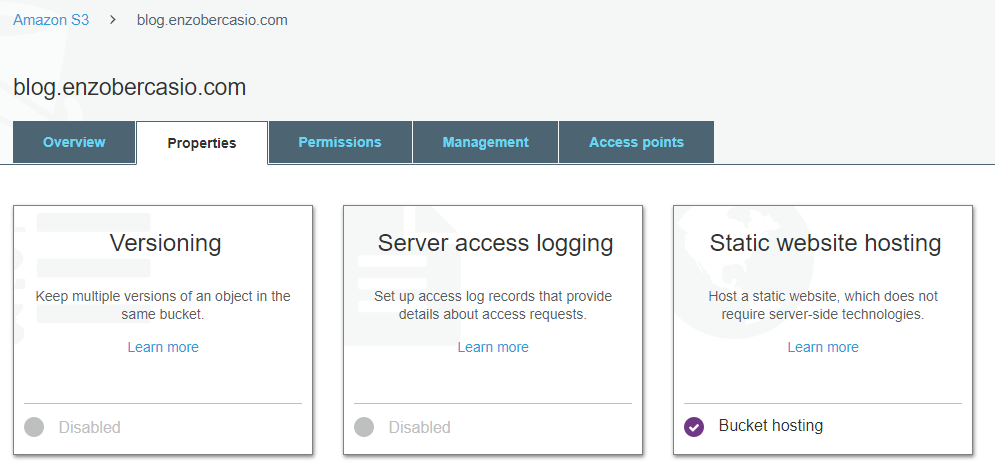
- Deploy the files to S3
Run the command to upload the static files into the new S3 bucket.
$ aws s3 sync --acl public-read --sse --delete /static/files/path s3://www.website.com
Once the upload completes, you can verify the static website by accessing the endpoint URL available in the AWS Static website hosting property. Copy the endpoint URL and open it in any browser to access the website.
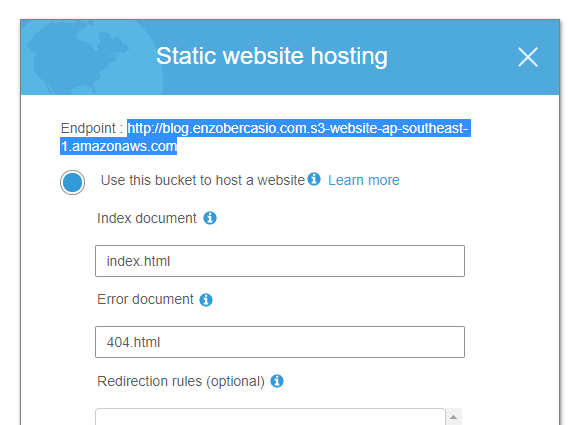
- Create CloudFront Distribution
In AWS console, go to the CloudFront page and click Create Distribution and select the Web section.
In the Origin Domain Name, make sure to input the endpoint URL from the Static website hosting and not the S3 bucket endpoint. You will get an Access Denied error when you try to open the site if you use the S3 Endpoint. Follow the other properties as below:
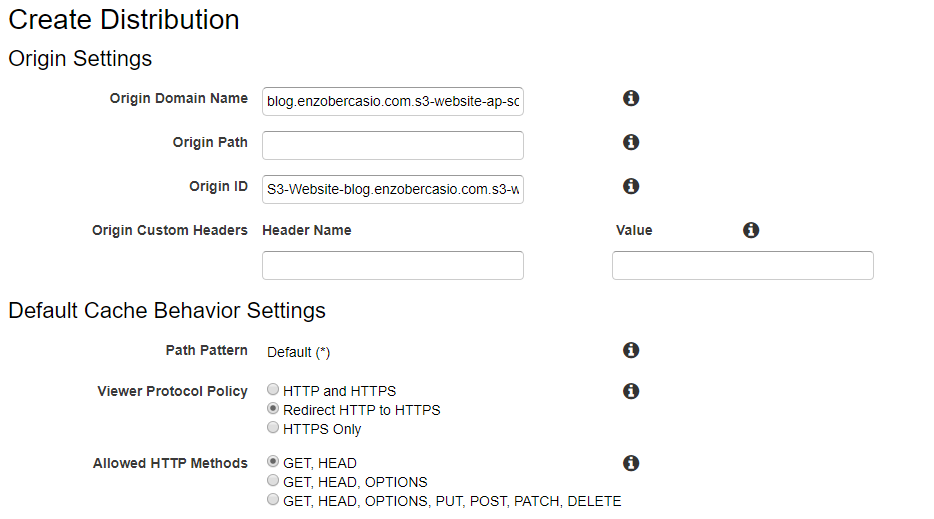
In the Alternate Domain Names, input the other domain values [e.g. www.enzobercasio.com, enzobercasio.com]. Choose Custom SSL Certificate for the SSL Certificate. Click Request or Import a Certificate with ACM. A new window will open for you to generate the SSL Certificate. Enter your domain name then click Review and Request. Once you confirm the request, an email will be sent out to your registered domain’s email address to verify your identity. Once the new SSL is validated, go back to the CloudFront distribution and select the newly generated certificate. Finally, click the Create Distribution button.
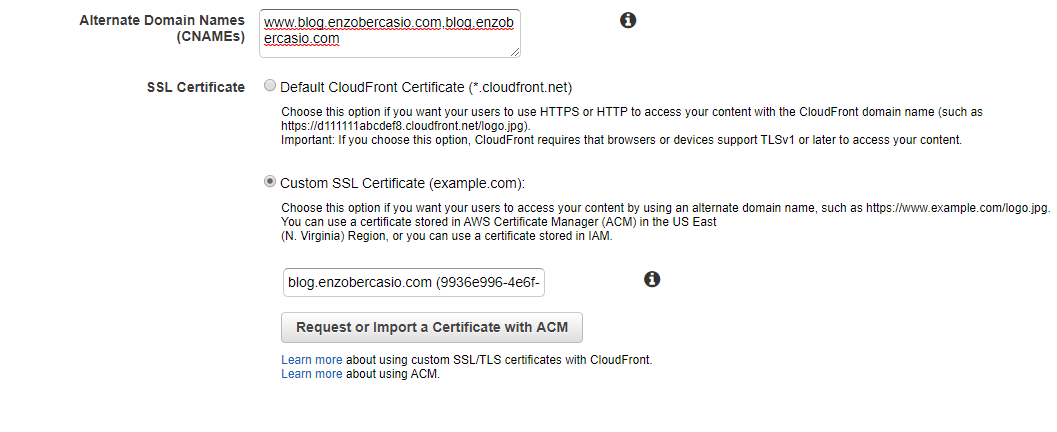
You may need to wait for about 15 minutes until your distribution status is Deployed. Once deployed, verify the website by using the CloudFront domain name.
- Configure DNS in Route53
As I have already created my domain previously and set it to point to my S3 bucket, I will need to configure it to render from the CloudFront distribution instead. Go to Route53 in AWS Console, in the Hosted Zones, select the domain name for your site. Modify the A type record set and point the Alias value to the newly created CloudFront distribution. Save the record set and verify the website by browsing using your domain name.

You may also verify the SSL Certificate by ensuring the connection is secure.
